Open source, clone https://github.com/ouya/ouya-unity-plugin directly from public GIT.
@OUYA - (Unity on OUYA Forums) - http://forums.ouya.tv/categories/unity-on-ouya
J 2013: [Feb 11] [Feb 18] [Mar 4A] [Mar 4B] [Mar 4C] [Mar 11] [Mar 18] [Mar 25] [Mar 27] [Apr 1] [Apr 8] [Apr 15] [Apr 22] [Apr 29] [May 6] [May 13] [May 23]
Several examples are included in the ouya-unity-plugin package.
Get the latest from GitHUB (3:59)
|
Intro to OUYA Unity Package (11:48)
|
OUYA Unity SDK - Intro on dependencies (2:41)
|
Key Store Setup (1:27)
|
Subscribe to Menu Button and Menu Appearing (5:18)
|
In-App-Purchase Setup - ShowProducts Example (11:46)
|
Example ShowUnityInput (21:59)
|
|
Show Guitar (1:06)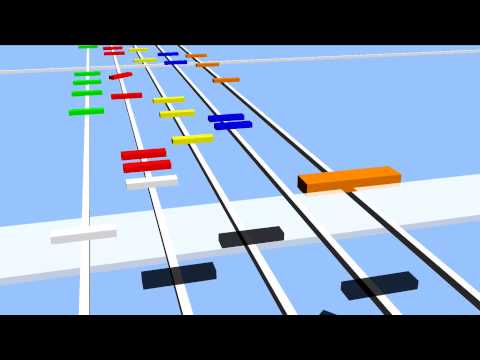
|
Show Drumkit (0:35)
|
Blending Animations with Mechanim (18:52)
|
Starter Kit - A multiple scene project example, which has an initial setup scene, a splash scene, along with a main menu scene, and a game scene. The sample setup is everything you need to start developing a project for the OUYA.
Ground Raycast - A simple example of raycasting to a ground plane using the camera projection.
Set Resolution - Change the resolution, not only with the Unity API, but pass the call to Java to update the view dimensions.
Mesh Performance - Compare frames per second speed when manipulating polygon count and overdraw.
NDK - Native code can often run faster and then example shows example interfaces to have C# call into a C native plugin.
Products - In-app-purchase example for getting products, requesting purchases, and getting receipts.
Sounds - Play various imported sounds
Sticks - A tool to plot a graph of the left and right stick for all the connected bluetooth controllers.
Unity Input - The newest input example which runs with less latency and uses the Unity Input API.
Camera - Access supported-connected webcams
###Recommended Tools
MonoDevelop - The default code editor
Eclipse - Useful to get intellisense when editing Java files
Intellij - An alternative Java editor
UnIDE - Unity extension allows in-editor script editing
Visual Studio - Best editor for C#
Resharper - Visual Studio extension for faster script editing and code refactoring
Android SDK - http://developer.android.com/sdk/index.html
Documentation - https://devs.ouya.tv/developers/docs/unity

Download the source to a new folder - https://github.com/ouya/ouya-unity-plugin

Open that folder as a Unity project.

Use the OUYA->Export Core to export the core package for your game.

Backup your game project.

Open your game project and import core.

Log into the developer portal and create a game.

https://devs.ouya.tv/developers/games

Assign a bundle id: com.yourcompany.title

Download the signing key and save into Assets\Plugins\Android\res\raw\key.der

In Unity open the OUYA Panel (Window->Open OUYA Panel)

Switch to the Java Panel and point to your JDK. It must be JDK6 1.6 32-bit. (Yes 32-bit.)

On Mac, install XCode and the development tools to get Java.

If nothing is grayed out switch to the Android tab.

Make sure the Android SDK is installed and updated.

https://devs.ouya.tv/developers/docs/setup

Run the Android SDK, and make sure the platform-tools are installed

Install the Platform-16 SDK.

Install the Extras/Android Support Libary.

Install the Google USB drivers.

Install and exit Android SDK.

You may need to re-add the (Home folder) ~/.android/adb_usb,ini 0x2836.

Make sure adb is in your path. (android-sdk/tools and android-sdk/platform-tools)

You should see your OUYA in adb devices with:

adb devices

Sometimes kill adb and rerun the above step to see devices.

adb kill-server

If nothing is grayed out in the OUYA Panel Android tab, switch to the OUYA tab.

If you are on Unity 4.X change the "Main Activity" to: OuyaNativeActivity

Enter your bundle id to match the developer portal.

Hit the sync button and the bundle id will be made to match.

In your initial scene add the OuyaGameObject prefab.

If you have multiple scenes, make sure in the inital launch scene that Application.LoadLevel is in Start()

so the Controller Awake() method has a chance to run.

Be sure to also enter your developer UUID from the developer portal in the inspector on the OuyaGameObject

in your initial scene.

https://devs.ouya.tv/developers

Review the Unity docs for setting up controller input.

For button input the examples use:

OuyaExampleCommon.GetButton (GetButton, GetButtonDown, GetButtonUp are available)

For axis input the examples use:

OuyaExampleCommon.GetAxis (GetAxis, GetAxisRaw are available)

Review the Unity docs for setting up in-app-purchases

Edit your build settings. File->Build Settings.

Set the platform to Android.

Click Player Settings.

Click the Android tab.

Under resolution Default Orientation should be Landscape Left.

Under other settings your bundle id should be set.

Under other settings set the Minimum API Level to 16.

On the OUYA Panel click the Compile Plugin button.

On the OUYA Panel click the Compile Java button.

If you have the free version of Unity, use the menu File->Build and Run.

If you have the Pro version, just hit Build and Run on the panel.
Be sure to git updates from github checkout or update the clean checkout folder.

Use the OUYA->Export Core to export the core package for your game.

Backup your game project.

Open your game project and import core.

When you import careful not to replace your signing key or custom icons.

Again you may need to resync to make the bundle id and package match.

Recompile the plugin.

Recompile the Java application.

Build and Run.

Always back your keystore.

The keystore is used by the auto updater.

If you lose your keystore, users have to manually uninstall to update.
On Unity 3.X, your main activity should be "OuyaUnityApplication".
On Unity 4.X, your main activity should be "OuyaNativeActivity".

+ProjectSettings\InputManager.asset - Axis mappings for all controllers
+---LitJson - JSON Encoding/Decoding Library
|       COPYING - License
|       IJsonWrapper.cs - Library implementation
|       JsonData.cs - Library implementation
|       JsonException.cs - Library implementation
|       JsonMapper.cs - Library implementation
|       JsonReader.cs - Library implementation
|       JsonWriter.cs - Library implementation
|       Lexer.cs - Library implementation
|       license.txt - License
|       ParserToken.cs - Library implementation
|
+---Ouya
|   \---SDK
|       +---Editor
|       |       OuyaMenuAdmin.cs - Provides menu item to export Core package
|       |       OuyaPanel.cs - The interactive OUYA Panel
|       |       OuyaPostProcessor.cs - Optional post processor for compiling Java
|       |
|       +---Prefabs
|       |       OuyaGameObject.prefab - Prefab with the OuyaGameObject
|       |
|       \---Scripts
|               OuyaGameObject.cs - Handles communication from Java to C#
|
\---Plugins
    |   IOuyaController.cs - Interface for supported controllers (WIP)
    |   OuyaController.cs - Mappings for supported controller (WIP)
    |   OuyaControllerCommon.cs - Common mapping logic (WIP)
    |   OuyaExampleCommon.cs - Common mappings for all controllers (recommended)
    |   OuyaKeyCodes.cs - Enum mappings for Unity API Keycodes
    |   OuyaSDK.cs - Logic for in-app-purchases
    |   PS2Controller.cs - Mappings for supported controller (WIP)
    |   XBox360Controller.cs - Mappings for supported controller (WIP)
    |
    \---Android
        |   AndroidManifest.xml - Defines the Android project and starting activity
        |   OuyaUnityApplication.jar - Compiled Java Application library
        |   OuyaUnityPlugin.jar - Java Compiled Plugin library
        |
        +---jni - C++ on Android
        |       Android.mk - Make file for compiling C++
        |       jni.cpp - JNI C++ implementation
        |
        +---libs
        |   |   gson-2.2.2.jar - Java JSON encoding
        |   |   guava-r09.jar - Google core library
        |   |   ouya-sdk.jar - The ODK
        |   |
        |   \---armeabi
        |           lib-ouya-ndk.so - Compiled C++ library
        |
        +---res
        |   +---drawable
        |   |       app_icon.png - Example icon
        |   |
        |   +---drawable-xhdpi
        |   |       ouya_icon.png - Example icon
        |   |
        |   +---layout
        |   |       main.xml - Android layout
        |   |
        |   +---raw
        |   |       key.der - signing key
        |   |
        |   \---values
        |           strings.xml - resource strings
        |
        \---src
                IOuyaActivity.java - Common static references
                OuyaNativeActivity.java - Start activity for Unity 4.X
                OuyaUnityApplication.java - Start activity for Unity 3.X
                OuyaUnityPlugin.java - Plugin interface for invoking Java from C#
                UnityOuyaFacade.java - In-app-purchase wrapper
Live Training Archive - http://unity3d.com/learn/tutorials/modules/beginner/live-training-archive/editor-basics
If you are new to Unity, this crash course should bring you up to speed on the Unity interface while you make a PhotoShop clone from scratch.
Paint Series 001 - 00 Introduction (1:27)
|
Paint Series 001 - 01 Asset (6:27)
|
Paint Series 001 - 02 Project (12:06)
|
Paint Series 001 - 03 Camera (0:59)
|
Paint Series 001 - 04 Canvas (3:45)
|
Paint Series 001 - 05 Material (0:59)
|
Paint Series 001 - 06 Scripting (10:21)
|
Paint Series 001 - 07 Input (12:12)
|
Paint Series 001 - 08 Resolution (16:39)
|
Paint Series 001 - 09 Conclusion (0:25)
|
Combine Materials to 1 draw call (12:01)
|
Tim Graupmann (tim@tagenigma.com)
The ouya-unity-plugin is targeted towards Unity developers intending to publish to the OUYA platform.
The OUYA SDK Unity Package supports publishing from Mac and Windows.
Welcome to the OUYA Unity developers club. This document will provide an overview for setting up the example Unity application to publish on the OUYA platform.
The forums are a great place for support and to get answers for common questions. There are several stickied posts in the Unity section. Be sure to watch out for updates to the SDK in the minor updates thread. There are 40 training videos and growing. There are also weekly hangouts to field support questions.
Open the checkout directory as the Unity base folder. From the Unity IDE menu use the OUYA menu to export the Core, Examples, and StarterKit individual packages. This makes it easier to update GIT and then bring in the Core changes directly into your game. The export package should open explorer/finder in the base folder where you'll find the exported package. And then import the desired package into your project.

You can also import packages to the focused Unity window with a double-click on the unitypackage file.
You will find the following structure imported into your Assets folder.
./LitJson – 3rd party JSON parsing library
./Ouya/Examples/Scenes/SceneShowProducts.unity – Example Products Scene
./Ouya/Examples/Scenes/SceneShowController.unity – Example Controller Scene
./Ouya/Examples/Scenes/SceneShowNDK.unity – Example NDK Scene
./Ouya/Examples/Scripts/OuyaInputManager.cs – Example script interacting with OUYA input
./Ouya/Examples/Scripts/OuyaShowController.cs – Script for showing controller states
./Ouya/Examples/Scripts/OuyaShowProducts.cs – Script for showing products
./Ouya/Examples/Scripts/OuyaShowNDK.cs – Script for showing C++ interaction
./Ouya/SDK/Editor/OuyaPanel.cs – Custom editor extension for OUYA
./Ouya/SDK/Prefabs/OuyaGameObject.prefab – OUYA SDK setup prefab
./Ouya/SDK/Scripts/OuyaGameObject.cs – OUYA SDK java interface
./Plugins/OuyaExampleCommon.cs – Common methods for examples like input
./Plugins/OuyaKeyCodes.cs – Enums for the key codes
./Plugins/OuyaSDK.cs – OUYA SDK Unity API
./Plugins/Android – Special folder for customizing Android platform publishing
./Plugins/Android/AndroidManifest.xml – Custom manifest, overrides the default
./Plugins/Android/libs – Jar libraries
./Plugins/Android/libs/gson-2.2.2.jar – GSON jar for parsing JSON in Java
./Plugins/Android/libs/guava-r09.jar – Google jar for Google API
./Plugins/Android/libs/ouya-sdk.jar – OUYA SDK jar for Java API
./Plugins/Android/OuyaUnityApplication.jar – Example application Jar
./Plugins/Android/OuyaUnityPlugin.jar – OUYA SDK interface Jar
./Plugins/Android/jni/Android.mk – Make file for building JNI
./Plugins/Android/jni/jni.cpp – C++ JNI interface
./Plugins/Android/res/drawable/app_icon.png – Custom application icon
./Plugins/Android/res/drawable-xhdpi/ouya_icon.png – Custom icon for the store
./Plugins/Android/res/raw/key.der – Signing key from the developer portal
./Plugins/Android/res/layout/main.xml – Custom android layout
./Plugins/Android/res/values/strings.xml – Custom android strings
./Plugins/Android/src/OuyaUnityApplication.java – Example Android Application Activity

// Auto generated, this location will vary depending on your bundle identifier
./Plugins/Android/src/tv/ouya/demo/OuyaUnityApplication/R.java
- Litjson: third party JSON parsing library for parsing in C#.
- Google-GSON: third party JSON parsing library for Java.
- Google-Guava: third party library for Google core.
Note: Although some of the example scenes have OuyaGameObject, the preferred way is to put OuyaGameObject into an init scene; see the starter kit for details.
Some of the example scenes used the free distribution of [NGUI]. NGUI is not required by the Core package.
Open the ./Ouya/Examples/Scenes/SceneShowProducts.unity example scene.

All scenes start with a Main Camera. There’s a custom GameObject added for OuyaGameObject which handles taking messages from the OUYA SDK from Java to C#. The “ShowProduct” GameObject is a simple display script for displaying retrieved products and invoking purchases. Since this example is a single scene that’s why it has the OuyaGameObject. Otherwise it would use the init scene setup.
Open the ./Ouya/Examples/Scenes/SceneShowUnityInput.unity example scene.
This example uses the Unity API Input to access input. The "Core" package also includes "ProjectSettings/InputManager.asset" which has 122 axises already defined. OuyaExampleCommon.cs has example mappings to handle the OUYA controller mappings along with other controllers.
Some player settings must be customized to build on Android. Open the player settings by navigating the menu to the Edit->Project Settings->Player menu item. The PlayerSettings will appear in the inspector.

In the inspector, expand the Resolution and Presentation section. Be sure to set your product and company name. The OUYA will use a default orientation for landscape. Choose landscape left from the drop down. Unity calls drop downs, pop ups (intuitively opposite).

Before any Android application can build you must set the bundle identifier. Be careful that the Bundle Identifier matches what you’ve used in the Android manifest. Also set the Minimum API Level to 16 or better. The OUYA console will be version 16, and the SDK used Android API 16 calls in the application Java for detecting controller connect/disconnect events. The screenshots may show 14 but you want to use 16.

Make sure you change the target platform to Android. Select Android and then click the button “Switch Platform”. Add a default scene by clicking the “Add Current”. Make sure at least one scene is checked. At this point you can build and enter the file path for the Android APK build.
Using the build settings, if you have more than one scene just by marking the toggles, you can switch between the loading scenes. You can use Unity script for switching between scenes.


Immediately after importing the OUYA SDK Unity Package, the OUYA Panel becomes available in the Menu. Use Window->Open Ouya Panel to open the OUYA Panel. The OUYA Panel will open which can be docked. The top of the panel has a unique identifier (MachineName_ProcessPID) to help identify the Unity process which is useful for debugging or task killing.

The OUYA panel has several tabs to show information for functional areas: “OUYA”, “Unity”, “Java JDK”, “Android SDK”, and “Android NDK”. Run through each tab to check for missing paths. Any missing path or file with grey out. You may need to browse to find JDK or SDK paths. There should be no greyed out tabs in order for the compile, build, and run automation to work.
The OUYA tab has a button section and then an info section below. The button “Build Application” will compile the Java Application and immediately build the Application APK for Android. The button “Build and Run Application” compiles the Java Application, builds the APK, and executes the APK on a connected device. The button “Compile” will compile the Java Application. The different compile buttons are available for your convenience which are helpful during customization. The post processor is off by default and will detect any Java/C++ change which will trigger a recompile. The “Sync Bundle ID” button will sync your Android manifest and Java Application package identifiers. The bundle identifier should be unique for every game. The APK name will change the name of the build output file. If you choose your Java Application name, you can specify an alternate name which is intended for hardcore tinkerers. The bundle prefix is just for debugging and is the first part of your bundle identifier. The App Java Pack is the package referenced by your Java Application. If the bundle identifier is mismatched and error will display here, in which case just click the sync button. The manifest pack refers to the bundle identifier specified in the Android manifest, and the sync button will fix a mismatch.

The information section has several meta references for quick navigation into the project. If any dependency, path, or file is missing it will be greyed out in the information panel. The bundle identifier that was set in player settings can be changed here. The bundle prefix is used when packaging the application jar and is based on the bundle identifier. The GameObject is a meta reference and clicking the object field will highlight that item in the scene view. New OUYA projects will need the OUYA GameObject added to the scene to accept communication from Java. There is an OUYA GameObject prefab in the project which can be dragged to the scene for easy setup. The OUYA SDK object field when clicked will navigate and highlight the Jar library. The same is true for both Guave and GSON jar libraries. The AndroidManifest is a custom manifest which is used in the Android build process. Make sure that the manifest matches the BundleIdentifier, if not your application will exit on start without detecting the main activity. R.java is autogenerated by the Android SDK when the compile button is pressed. The R.java uses the main layout for automatic generation. The Application.Java references the example OuyaUnityApplication.java which is an Activity which passes input to the OuyaPlugin.jar which can be subscribed to like in the example controller script. “Res” and “Src” folders are custom folders that can be customized during the APK building process. The custom icon is located in the “Res” folder. The Application java file is in the “Src” folder.
The Unity Tab has useful path information. The Unity JAR “classes.jar” contains the library necessary for Java to instantiate the Unity Web Player and communicate with the Unity Web Player. The path is detected from Unity and depends on where the editor was installed. The Unity project folder is the base folder for the current project. The OUYA SDK Unity Package should support Unity 3.5.0 or greater.

The Java JDK Tab lets the user specify their path to the Java JDK on Windows. On Mac, the JDK is part of the OS install. Some background, make sure you use a 32-bit install of the Java JDK. You’ll want to use 1.6 as your Java target for optimal compatibility. Only more recent Unity versions support JDK 1.7. The path information below shows the path to the “tools.jar” on Windows. On the Mac the tools jar is “classes.jar”. On Windows the path links to file executables for Jar packaging, Java compiler, and the Java disassembler for generating signatures. On Mac, the path links to file applications, similar to Windows. The button “Select SDK Path..” will open a folder browse dialog to find the JDK path. “Reset paths” will set to a Default. Any missing path will be grayed out.

The Android Tab has info to point to the Android SDK download location. Windows has an installer for a more standard location; where Mac has an arbitrary unpacked zip. The info pane shows the Android min SDK version from the player settings. Android JAR is used in the classpath when compiling the Application jar. ADB path is the application file path for the ADB platform tool in the Android SDK. ADB is useful to get the list of connected devices, install, and launch APK on devices. APT is yet another Android SDK useful tool. And the SDK path is the path to the Android SDK. The “Select SDK Path…” button will open a folder browse dialog to find the Android SDK base folder. Reset path will use the default. Any missing links will grey out.

The NDK Tab shows info for the Android NDK. Windows and Mac are just an archive, so you’ll need to point the tab to where you unpack. NDK allows compiling the C++ NDK example which potentially can also wrap JNI. You can wrap the JNI from both C++ and C# to pick the best approach for your application. The JNI.cpp example has an easy reference from within the Android plugins folder. On Windows and Mac, there is a patch that needs to be applied to NDK in order to fix a compile issue which is explained here: https://groups.google.com/forum/?fromgroups=#!topic/android-ndk/b4DSxE1NAS0 on Google groups. The NDK can be downloaded from http://developer.android.com/tools/sdk/ndk/index.html the android site.

Since the initial writing of this document, controller input for games has been optimized. When examples are a single scene, they each include a single instance of the OuyaGameObject prefab. In other cases where multiple scenes are being used, you want to go with an init scene approach. Your game will usually want an initial scene, splash screen, a menu scene, and a game scene. The initial scene will contain an OuyaGameObject and is the only scene that will contain it. The initial scene will have a script that immediately loads your menu scene. And from your menu scene and game scene they will not contain a duplication OuyaGameObject. Everything other than the initial scene can load new scenes and switch between them freely. In your initial game scene, this is not the place where you enter your developer id that you’ll find on the OUYA developer portal. The OuyaGameObject also has other parameters for turning on debugging and raw debug logging. Debugging is useful for setting up an unrecognized controller.
The SDK now includes a starter kit to jump start users into a proper scene and project setup. The starter kit has 4 scenes, SceneInit, SceneSplash, SceneMain, and SceneGame. Be sure to add all 4 scenes to the build settings when using the starter kit.
The starter kit begins with SceneInit which has the only OuyaGameObject instance. The OuyaGameObject has don’t destroy on load and should only be placed into the init scene. You should never have duplicate OuyaGameObjects in your scene. The OuyaSceneInit script powers the SceneInit scene. SceneInit immediately loads the next scene which transitions to the SceneSplash.
SceneSplash displays a splash screen that fades in, holds, and then fades out. To display the splash screen a plane was used. The OuyaScreenSplash has a public material reference and the timers affect the alpha channel of the material. The material uses a shader that uses an alpha channel to fade in the splash texture.
The directional light brightens the splash image. After the timers elapse, the SceneMain scene is loaded.
SceneMain is a simple example of switching scenes powered by a GUI button. OuyaSceneMain drives the GUI event. The OuyaSceneMain has a scene parameter for “SceneMain” which tells it which scene to load next. The next scene after SceneMain changes to SceneGame when the button “Load the Game Scene” is clicked. The SceneMain is a placeholder for showing the main menu from your game.
SceneGame is just like SceneMain as it has a button to switch back to the main menu SceneMain scene. The button is labelled “Back to Main Scene” and when clicked goes back to the SceneMain scene. OuyaSceneGame is the script that powers the SceneGame scene. This scene is a placeholder for your game scene.
The package includes several example scenes. Each example scene has a custom script that highlights a functional area. Each OUYA example will need the OuyaGameObject added to only the initial scene. Refer to the starter kit for more info. There is an OuyaGameObject prefab that you can drag to the initial scene to create the game object. This object is responsible for letting the OUYA java interface send messages to Unity. Unity can communicate with Java and C++ via the OuyaSDK class. The OuyaGameObject is where you enter your developer id from the developer portal. OuyaGameObject is how Java talks to Unity C#. And the OuyaSDK is how Unity C# communicates with Java.
This example scene maps known controllers to a virtual 3d controller. That said, you may have an unrecognized controller that you are testing while doing development. If your controller is not recognized, let us know by posting in the developer forums. In the example, as you press a controller button, the axis or button will highlight on the virtual control. As you move your physical controller axis, the virtual controller axis will move. The scene has an instance of the controller model, and the example OuyaShowUnityInput script. The attached script has meta references to the specific controller parts to control the highlighting and movement. Each button and axis has a MeshRenderer component which is used to access the material and change the color. From the MeshRenderer component, the transform can be accessed to rotate the thumbsticks and triggers. The axis and button values are provided from the Unity Input API, where the OUYA SDK obtains the proper mappings for the controller.
The OUYA Bluetooth controller, PS2/3 controllers, and XBOX wired/wireless controllers all work while testing in the Unity3d Editor. The same controllers will also work connected to the OUYA console.

To be able to attach a script to a GameObject, the example must extend MonoBehaviour. The input logic script should implement the OUYA SDK input listeners.
The MenuButtonUp listener is invoked when the system button sends a onKeyUp KeyEvent.
The MenuAppearing listener is invoked when the system button is double tapped, or is held longer than a second.
The the pause and resume interface to handle pause and resume events.
public class OuyaShowController : MonoBehaviour,
    OuyaSDK.IJoystickCalibrationListener,
    OuyaSDK.IMenuButtonUpListener,
    OuyaSDK.IMenuAppearingListener,
    OuyaSDK.IPauseListener,
    OuyaSDK.IResumeListener
The developer identifier is now entered in the init scene in the inspector on the OuyaGameObject scene object. The developer id is found in the developer portal.
Per the interface for the listeners, register in the Awake event.
Conversely, unregister in the OnDestroy event.
    void Awake()
    {
        OuyaSDK.registerJoystickCalibrationListener(this);
        OuyaSDK.registerMenuButtonUpListener(this);
        OuyaSDK.registerMenuAppearingListener(this);
        OuyaSDK.registerPauseListener(this);
        OuyaSDK.registerResumeListener(this);
    }
    void OnDestroy()
    {
        OuyaSDK.unregisterJoystickCalibrationListener(this);
        OuyaSDK.unregisterMenuButtonUpListener(this);
        OuyaSDK.unregisterMenuAppearingListener(this);
        OuyaSDK.unregisterPauseListener(this);
        OuyaSDK.unregisterResumeListener(this);
    }
It's a good idea to clear the input state when the scene loads and when the scene is destroyed.
    void Awake()
    {
        Input.ResetInputAxes();
    }
    void OnDestroy()
    {
        Input.ResetInputAxes();
    }
When a controller connects or disconnects, a calibration event will fire.
    public void OuyaOnJoystickCalibration()
    {
    }
When the system button is pressed, show your pause menu.
    public void OuyaMenuButtonUp()
    {
    }
When your game is about to close, prepare to exit.
    public void OuyaMenuAppearing()
    {
    }
With the pause/unpause listeners you need to need to implement OuyaOnPause and OuyaOnResume events. This is where you can shutdown your game, or reinitialize the game on resume, or potentially save your game state.
    public void OuyaOnPause()
    {
    }

    public void OuyaOnResume()
    {
    }
####OUYA Example Common code
Examples share common code which is found in the OuyaExampleCommon.cs script.
Make sure your init scene includes the OuyaGameObject GameObject with the OuyaGameObject script attached.
Some examples need to select a single controller at a time. The controller index is the current selected controller for the example. Especially with the OuyaShowUnityInput example where input is only shown for the selected controller.
public class OuyaExampleCommon
{
	public static OuyaSDK.OuyaPlayer Player = OuyaSDK.OuyaPlayer.player1;
}
When dealing with controllers and getting the Axis values keep deadzones in mind. You may need to tweak the values. Generally an inner deadzone value of 0.3 is cautious enough. Using the common input code, getting an axis allows you to pass an enum value to specify the axis, and a player controller enum for the controller. The common code uses the joystick name, finds the intended axis and returns the Input.RawAxis value from the Unity API. RawAxis values are uninterpolated values without any smoothing applied. Conversely, Input.GetAxis applies Unity smoothing. And Mathf.Abs is used to check for the inner deadzone whether the axis value is positive or negative.
public class OuyaShowUnityInput
{
    void Update()
    {
    	if (Mathf.Abs(OuyaExampleCommon.GetAxis(OuyaSDK.KeyEnum.AXIS_LSTICK_X, OuyaExampleCommon.Player)) < 0.3)
    	{
    		//in the deadzone, ignore input
    	}
    	else
    	{
    		//handle input and do something
    	}
    }
}
The OuyaSDK has a list of common enums for axises and buttons that map to the supported controllers. The KeyEnum also includes some controller specific values. Oh yeah and there's some Rockband (TM) controller mappings in there too.
public static class OuyaSDK
{
    public enum KeyEnum
    {
        NONE = -1,
        BUTTON_O = OuyaSDK.BUTTON_O,
        BUTTON_U = OuyaSDK.BUTTON_U,
        BUTTON_Y = OuyaSDK.KEYCODE_BUTTON_Y,
        BUTTON_A = OuyaSDK.BUTTON_A,
        BUTTON_LB = OuyaSDK.BUTTON_LB,
        BUTTON_LT = OuyaSDK.KEYCODE_BUTTON_L2,
        BUTTON_RB = OuyaSDK.BUTTON_RB,
        BUTTON_RT = OuyaSDK.BUTTON_RT,
        BUTTON_L3 = OuyaSDK.BUTTON_L3,
        BUTTON_R3 = OuyaSDK.BUTTON_R3,
        BUTTON_SYSTEM = OuyaSDK.BUTTON_SYSTEM,
        BUTTON_START = OuyaSDK.BUTTON_START,
        BUTTON_SELECT = OuyaSDK.BUTTON_SELECT,
        BUTTON_ESCAPE = OuyaSDK.BUTTON_ESCAPE,
        AXIS_LSTICK_X = OuyaSDK.AXIS_LSTICK_X,
        AXIS_LSTICK_Y = OuyaSDK.AXIS_LSTICK_Y,
        AXIS_RSTICK_X = OuyaSDK.AXIS_RSTICK_X,
        AXIS_RSTICK_Y = OuyaSDK.AXIS_RSTICK_Y,
        BUTTON_DPAD_UP = OuyaSDK.BUTTON_DPAD_UP,
        BUTTON_DPAD_RIGHT = OuyaSDK.BUTTON_DPAD_RIGHT,
        BUTTON_DPAD_DOWN = OuyaSDK.BUTTON_DPAD_DOWN,
        BUTTON_DPAD_LEFT = OuyaSDK.BUTTON_DPAD_LEFT,
        BUTTON_DPAD_CENTER = OuyaSDK.BUTTON_DPAD_CENTER,

        BUTTON_BACK,

        HARMONIX_ROCK_BAND_GUITAR_GREEN,
        HARMONIX_ROCK_BAND_GUITAR_RED,
        HARMONIX_ROCK_BAND_GUITAR_YELLOW,
        HARMONIX_ROCK_BAND_GUITAR_BLUE,
        HARMONIX_ROCK_BAND_GUITAR_ORANGE,
        HARMONIX_ROCK_BAND_GUITAR_LOWER,
        HARMONIX_ROCK_BAND_GUITAR_WHAMMI,
        HARMONIX_ROCK_BAND_GUITAR_PICKUP,
        HARMONIX_ROCK_BAND_GUITAR_STRUM,

        HARMONIX_ROCK_BAND_DRUMKIT_GREEN,
        HARMONIX_ROCK_BAND_DRUMKIT_RED,
        HARMONIX_ROCK_BAND_DRUMKIT_YELLOW,
        HARMONIX_ROCK_BAND_DRUMKIT_BLUE,
        HARMONIX_ROCK_BAND_DRUMKIT_ORANGE,
        HARMONIX_ROCK_BAND_DRUMKIT_A,
        HARMONIX_ROCK_BAND_DRUMKIT_B,
        HARMONIX_ROCK_BAND_DRUMKIT_X,
        HARMONIX_ROCK_BAND_DRUMKIT_Y,
	}
}
OuyaShowUnityInput also uses OuyaExampleCommon to get button state. The method takes an enum button and an enum controller for the player number. OuyaExampleCommon.GetButton finds the button mapping based on the controller name and then invokes the Input.GetKey method. This finds the current state of the button. This doesn't find whether the button was just pressed. If you rely on the Unity Input API to check if the button was just pressed, there's always a chance that you might have missed the event. I personally like to keep track of such things in my own code. That said this framework allows you to call the Unity Input API, so if you highly desire calling Input.GetButtonDown and Input.GetButtonUp you can.
public class OuyaShowUnityInput
{
    void Update()
    {
		if (OuyaExampleCommon.GetButton(OuyaSDK.KeyEnum.BUTTON_L3, OuyaExampleCommon.Player))
    	{
    		//button is pressed
    	}
    	else
    	{
    		//button is not pressed
    	}
    }
}
And here's a base player script that you can attach to a gameObject to achieve multiple controller support.
using UnityEngine;

public class Player : MonoBehaviour,
    OuyaSDK.IMenuButtonUpListener,
    OuyaSDK.IMenuAppearingListener,
    OuyaSDK.IPauseListener,
    OuyaSDK.IResumeListener
{
    private const float INNER_DEADZONE = 0.3f;

    private const float MOVE_SPEED = 5f;

    public OuyaSDK.OuyaPlayer Index;

    void Awake()
    {
        OuyaSDK.registerMenuButtonUpListener(this);
        OuyaSDK.registerMenuAppearingListener(this);
        OuyaSDK.registerPauseListener(this);
        OuyaSDK.registerResumeListener(this);
        Input.ResetInputAxes();
    }
    void OnDestroy()
    {
        OuyaSDK.unregisterMenuButtonUpListener(this);
        OuyaSDK.unregisterMenuAppearingListener(this);
        OuyaSDK.unregisterPauseListener(this);
        OuyaSDK.unregisterResumeListener(this);
        Input.ResetInputAxes();
    }

    public void OuyaMenuButtonUp()
    {
    }

    public void OuyaMenuAppearing()
    {
    }

    public void OuyaOnPause()
    {
    }

    public void OuyaOnResume()
    {
    }

    void Update()
    {
        Vector3 pos = transform.position;

        Vector2 input;
        input.x = OuyaExampleCommon.GetAxis(OuyaSDK.KeyEnum.AXIS_LSTICK_X, Index);
        input.y = OuyaExampleCommon.GetAxis(OuyaSDK.KeyEnum.AXIS_LSTICK_Y, Index);

        if (Mathf.Abs(input.x) > INNER_DEADZONE)
        {
            pos.x += input.x*MOVE_SPEED*Time.deltaTime;
        }

        if (Mathf.Abs(input.y) > INNER_DEADZONE)
        {
            pos.y -= input.y*MOVE_SPEED*Time.deltaTime;
        }

        transform.position = pos;
    }
}It's common for projects to have used input mappings in Edit->Project Settings->Input to use friendly names like "Horizontal/Vertical/Fire/Jump" etc. The problem is those friendly names map to a specific controller axis number and button number. And the trouble is you might use the same controller on multiple platforms, but the axis and button number will not stay the same. A dpad button on the OUYA may map to the left trigger in the Windows editor and something entirely different on Mac. Again the mappings are different on Linux. So it's best to configure your input manager settings as a straight pass-through. Let the code manage the mappings on each platform. And then with a mapping class like below you can continue to use the friendly names, but in this way it will always map to the right axis and button no matter which platform you use.
using System;
using UnityEngine;

public static class InputManager
{
    public static float GetAxis(string inputName, OuyaSDK.OuyaPlayer player)
    {
        switch (inputName)
        {
            case "FirePrimary":
                return OuyaExampleCommon.GetAxis(OuyaSDK.KeyEnum.BUTTON_RT, player);
            case "FireSecondary":
                return OuyaExampleCommon.GetAxis(OuyaSDK.KeyEnum.BUTTON_LT, player);
            case "Roll":
                return OuyaExampleCommon.GetAxis(OuyaSDK.KeyEnum.AXIS_LSTICK_X, player);
            case "Throttle":
                return OuyaExampleCommon.GetAxis(OuyaSDK.KeyEnum.AXIS_LSTICK_Y, player);
            case "Pitch":
                return OuyaExampleCommon.GetAxis(OuyaSDK.KeyEnum.AXIS_RSTICK_Y, player);
            case "Yaw":
                return OuyaExampleCommon.GetAxis(OuyaSDK.KeyEnum.AXIS_RSTICK_X, player);
            default:
                return 0;
        }
    }

    public static bool GetButton(string inputName, OuyaSDK.OuyaPlayer player)
    {
        switch (inputName)
        {
            case "Afterburner":
                return OuyaExampleCommon.GetButton(OuyaSDK.KeyEnum.BUTTON_O, player);
            case "FirePrimary":
                return OuyaExampleCommon.GetButton(OuyaSDK.KeyEnum.BUTTON_RT, player);
            case "FireSecondary":
                return OuyaExampleCommon.GetButton(OuyaSDK.KeyEnum.BUTTON_LT, player);
            case "LinkPrimary":
                return OuyaExampleCommon.GetButton(OuyaSDK.KeyEnum.BUTTON_RB, player);
            case "LinkSecondary":
                return OuyaExampleCommon.GetButton(OuyaSDK.KeyEnum.BUTTON_LB, player);
            case "CycleTarget":
                return OuyaExampleCommon.GetButton(OuyaSDK.KeyEnum.BUTTON_U, player);
            case "CycleViewMode":
                return OuyaExampleCommon.GetButton(OuyaSDK.KeyEnum.BUTTON_Y, player);
            case "SpecialManeuver":
                return OuyaExampleCommon.GetButton(OuyaSDK.KeyEnum.BUTTON_O, player);
            default:
                return false;
        }
    }
}
The products example shows how to get details about items that can be purchased in the OUYA store. The example comes with a list of example products. You will need to register your own products and product ids in the developer portal. For the example to run on your test device, make sure the OUYA Launcher is installed and running. The OUYA SDK provides methods for getting the details and invoking a purchase. When a purchase is invoked the OUYA Launcher will display a purchase layer above the Unity application. The result of the purchase is returned in the purchase success or failure event which you can handle in your Unity application. You can also get access to purchase receipts to verify the purchase. These methods allow you to create your own store presentation or in-app purchases while the transaction is happening in the OUYA Launcher. In the example, OuyaShowProducts script displays the UI using Unity GUI in the OnGUI event. The Get Products button will invoke getting the products, although this also happens in the Awake event. The purchase button will invoke a purchase event which will open layout above the Unity application in the OUYA Launcher.

The general steps for in-app-purchases are:
-
If network connection isn't present then check player prefs to see if the full game has been unlocked.
-
If network connection is available, check receipts for the purchase.
-
If the purchase is found in receipts, set the player prefs that the game is unlocked.
-
If the purchase is not found in receipts, show the store/buy button and remove full game unlocked from player prefs.
-
When the buy button is pressed, request a purchase.
-
Upon successful purchase set the player prefs for full game unlocked.
-
If the player prefs has full game unlocked, show a visual change that the game is unlocked.
To give access to generic lists, import the required namespace.
// C#
using System.Collections.Generic;
// JavaScript
import System.Collections.Generic;
Add listeners for the purchase-iap-system areas for FetchGamerInfo, GetProducts, Purchase, and GetReceipts.
// C#
public class OuyaShowProducts : MonoBehaviour,
   OuyaSDK.IPauseListener,
   OuyaSDK.IResumeListener,
   OuyaSDK.IFetchGamerInfoListener,
   OuyaSDK.IGetProductsListener,
   OuyaSDK.IPurchaseListener,
   OuyaSDK.IGetReceiptsListener
// JavaScript
public class OuyaShowProducts extends MonoBehaviour implements
OuyaSDK.IPauseListener,
OuyaSDK.IResumeListener,
OuyaSDK.IFetchGamerInfoListener,
OuyaSDK.IGetProductsListener,
OuyaSDK.IPurchaseListener,
OuyaSDK.IGetReceiptsListener
Enter your purchasables into the OuyaGameObject. The developer creates purchasables in the developer portal. And then the OuyaGameObject has a ProductKey list where you enter the product app ids from the developer portal.
Register your FetchGamerInfoListener, GetProductsListener, PurchaseListener, and GetReceiptsLister in the Awake and clear in the OnDestroy events.
// C#
    void Awake()
    {
        OuyaSDK.registerFetchGamerInfoListener(this);
        OuyaSDK.registerGetProductsListener(this);
        OuyaSDK.registerPurchaseListener(this);
        OuyaSDK.registerGetReceiptsListener(this);
    }
    void OnDestroy()
    {
        OuyaSDK.unregisterFetchGamerInfoListener(this);
        OuyaSDK.unregisterGetProductsListener(this);
        OuyaSDK.unregisterPurchaseListener(this);
        OuyaSDK.unregisterGetReceiptsListener(this);
    }
// JavaScript
function Awake()
{
OuyaSDK.registerFetchGamerInfoListener(this);
OuyaSDK.registerGetProductsListener(this);
OuyaSDK.registerPurchaseListener(this);
OuyaSDK.registerGetReceiptsListener(this);
}
function OnDestroy()
{
OuyaSDK.unregisterFetchGamerInfoListener(this);
OuyaSDK.unregisterGetProductsListener(this);
OuyaSDK.unregisterPurchaseListener(this);
OuyaSDK.unregisterGetReceiptsListener(this);
}
It’s recommended that you avoid switching scenes when events are pending. As in, don’t request receipts and immediately switch scenes before the callback happens. Also be sure to invoke a single request and wait for the response before invoking the iap service again.
The listeners implement an OnSuccess, OnFailure, and OnCancel callback.
The gamer uuid and username for the logged in user is accessible while the console is connected to the Internet.
// C#
    public void OuyaFetchGamerInfoOnSuccess(string uuid, string username)
    {
    }
    public void OuyaFetchGamerInfoOnFailure(int errorCode, string errorMessage)
    {
    }
    public void OuyaFetchGamerInfoOnCancel()
    {
    }
// JavaScript
public function OuyaFetchGamerInfoOnSuccess(uuid : String, username : String)
{
}
public function OuyaFetchGamerInfoOnFailure(errorCode : int, errorMessage : String)
{
}
public function OuyaFetchGamerInfoOnCancel()
{
}
To get a list of products (which includes the price information), invoke OuyaSDK.requestProductList and pass a list of purchasables. You likely want to obtain prices from the server to avoid hardcoding prices and showing an inaccurate price.
// C#
    public void OuyaGetProductsOnSuccess(List<OuyaSDK.Product> products)
    {
        foreach (OuyaSDK.Product product in products)
        {
        }
    }
    public void OuyaGetProductsOnFailure(int errorCode, string errorMessage)
    {
    }
    public void OuyaGetProductsOnCancel()
    {
    }
// JavaScript
public function OuyaGetProductsOnSuccess(products : List.<OuyaSDK.Product>)
{
for (var product : OuyaSDK.Product in products)
{
}
}
public function OuyaGetProductsOnFailure(errorCode : int, errorMessage : String)
{
}
public function OuyaGetProductsOnCancel()
{
}
Start a purchase by invoking OuyaSDK.requestPurchase and pass the product identifier that you obtained from the list of purchasables. Be sure to wait for the callback result before invoking another purchase.
// C#
    public void OuyaPurchaseOnSuccess(OuyaSDK.Product product)
    {
    }
    public void OuyaPurchaseOnFailure(int errorCode, string errorMessage)
    {
    }
    public void OuyaPurchaseOnCancel()
    {
    }
// JavaScript
public function OuyaPurchaseOnSuccess(product : OuyaSDK.Product)
{
}
public function OuyaPurchaseOnFailure(errorCode : int, errorMessage : String)
{
}
public function OuyaPurchaseOnCancel()
{
}
Games need to check whether the game has been unlocked or whether to show a BUY NOW button. Check the user’s receipt list for the purchasable identifier to see if the content has been unlocked. Call OuyaSDK.requestReceiptList to get the list of receipts and check the identifier.
// C#
    public void OuyaGetReceiptsOnSuccess(List<OuyaSDK.Receipt> receipts)
    {
        foreach (OuyaSDK.Receipt receipt in receipts)
        {
                if (receipt.identifier == "__MY_ID__")
                {
                    //detected purchase
                }
        }
    }
    public void OuyaGetReceiptsOnFailure(int errorCode, string errorMessage)
    {
    }
    public void OuyaGetReceiptsOnCancel()
    {
    }
// JavaScript
public function OuyaGetReceiptsOnSuccess(receipts : List.<OuyaSDK.Receipt>)
{
for (var receipt : OuyaSDK.Receipt in receipts)
{
if (receipt.identifier == "__MY_ID__")
{
//detected purchase
}
}
}
public function OuyaGetReceiptsOnFailure(errorCode : int, errorMessage : String)
{
}
public function OuyaGetReceiptsOnCancel()
{
}
The NDK Example shows how to write C++ and interface that with Unity. The Unity GUI is simply buttons that are invoking C++ methods from Unity. The “Clear Results” button will set the local fields back to their defaults. “Invoke Android Hello World” will invoke the example method which will allocate a string in C++ and pass it back to Unity. Unity will then release the C++ memory string after it is received. The result is displayed in a GUI label. The button “Invoke Android ExampleFunction1” invokes the C++ example which passes a byte array an int parameter by out. These examples are useful when you want to pass something like PNG bytes from C# to C++ and/or get information back from the C++ side. This example uses C++ code which can also interface with the JNI and other C++ libraries. With C++ you can also write code to natively access custom hardware. The C++ is natively compiled in the OUYA panel.

First take a look at the native C++ code interface, which is being invoked from Unity. This source is located in a file called “jni.cpp” because that’s what the Android NDK build scripts look for. NDK compiles the C++ code and places into the target “Assets\Plugins\Android\libs\armeabi\lib-ouya-ndk.so” library.
extern "C"
{
	char* AndroidGetHelloWorld(long* size);
	void AndroidReleaseMemory(char* buffer);
	void AndroidExampleFunction1(unsigned char* a, int b, int* c);
}
Now back to the C# Unity side. To be able to attach a script to a GameObject, the example must extend MonoBehaviour.
public class OuyaShowNDK : MonoBehaviourFor organization, the C++ interface was placed into an AndroidPlugin structure, although this is not required.
private struct AndroidPluginTo import the method from C++ first you need to name the C++ library.
[DllImport("lib-ouya-ndk")]Next, the C# matching signature is added to correspond with the C++ interface.
private static extern IntPtr AndroidGetHelloWorld(out long size);When you invoke AndroidGetHelloWorld if the DLL is missing, the call with throw an exception and likely kill the application on the target device. This method allocates a “Hello World” string in C++ and returns the pointer back to C# while setting the string length using the size out parameter. The memory is released by calling the AndroidReleaseMemory method.
private static extern void AndroidReleaseMemory(IntPtr buffer);The AndroidExampleFunction1 is an example of passing various argument types. To be able to pass the byte array, a calling convention is specified.
[DllImport("lib-ouya-ndk", CallingConvention = CallingConvention.Cdecl)]
private static extern void AndroidExampleFunction1(byte[] a, int b, out int c);
You can find other marshalling examples and supported types by visiting the http://pinvoke.net site.